Axolotl-Friendly Aquascaping
This article is an in-depth introduction to aquascaping an aquarium to make it a beautiful, practical and a happy home for Axolotls.
Aquascaping is simply the art of creating an under-water landscape, and what better place to do that than in your axolotl’s home? Care of axolotls is different to care of fish or other aquatic animals so this must be taken into consideration when planning an aquascape, remember that it’s an axolotl tank, not a plant tank that happens to have some axolotls in it!
The aim is to provide you with the inspiration and skills to go and create your own beautiful home for your axolotls.
Before you get started on creating your aquascape, let’s look at the important considerations relating to the health and comfort of axolotls and what you need to take into account when planning the environment.
1. Substrate
Gravel is not a good substrate for axolotls as they may accidentally swallow it and get caught in their digestive tract (impaction). As the substrate is the first thing to go in, we need to get this right from the start.
2. Light
Axolotls have no eyelids and they don’t like it too bright, we need to consider this in our aquascape design.
3. Temperature
Axolotls don’t like it too warm, and can become very stressed if the temperature rises too much. Many aquatic plants are tropical and need warmer water so we need to carefully consider the plants we use in our aquascape.
Substrate
We have established that gravel poses as a health risk to the axolotls, so we have to consider viable alternatives. It is generally recommended to use sand or no substrate. However, having no substrate greatly reduces the types of plants that can be kept as many aquatic plants require substrate to anchor and develop a healthy root system.
Plant specific substrateA solution is to use a plant-specific substrate, such as Flora Base, by Red Sea, which is especially designed for supporting plant growth. It has the following benefits:
- It's small and soft so no impaction risk.
- It doesn't adversely alter the water chemistry.
- It's easy for rooted plants to get established in.
- It contains nutrients for plant growth.
- It doesn’t contain toxic substances.
There are several different types of plant substrate on the market, but not all are appropriate for an axolotl tank. When choosing one, ensure that it fits the above list of considerations.
Plant-specific substrates are not cheap - Flora Base is about AU$70 for a 5.4 kg (12lb) bag and the other choices are very similar in pricing. That doesn't go far in a large tank since you aim to lay an inch thick of substrate cover over the base of the tank. Though it is expensive it will promote much better plant growth and provide a safe and attractive base to your tank.
When laying the substrate, follow the manufacturer’s instructions. If you’re keen to save some money and have a reasonably clear idea of where you will be planting rooted plants in the tank then you can place areas of sand down in the space where there won’t be any. This way, when you’ve finished laying your substrate you’ll have a bit of a patchwork between the sand and the plant substrate - quite an attractive effect in its own right.
SandAlternatively, you might like to stick to using sand as substrate. Sand is made of minerals and tiny pieces of rock that have come from the erosion and weathering of rocks. The composition of sand varies from place to place depending on the sources and conditions of the local rocks. The most common constituent of sand in inland continental settings (e.g. deserts) and non-tropical coastal settings (e.g. beaches), is silica (silicon dioxide SiO2), often in the form of quartz.
The most suitable for aquarium use by far is silica based sand. Marine sand which is made up of coral that has passed through the digestion system of the parrot fish should not be used in freshwater applications, as it causes severe shifts in water hardness and alkalinity.
Arkose is a sand or sandstone with a high content of feldspar (an Aluminum Silicate), usually derived from the weathering and erosion of nearby granite. Feldspar has a negligible solubility in water so aluminum toxicity risk is at a minimum, however, this sand should be avoided as it is likely to contain various forms of lead and copper.
Natural black sand is comprised of mostly basalt and obsidian, and is safe to use. Natural white sand is mostly silica and is also safe to use. Most commercially available sands for pet trade use are made from one of these two.
Most commercial sands are thoroughly washed and sifted. These are sold by many sizes and grades. Sedimentary based sands containing high amounts of shale should be avoided. Silica and quartzite based sands are perfectly safe, as long as they have not been premixed with dangerous substances like Portland cement or lime. An acid test with muretic acid should be used to determine the safety of the sand. If it fizzes in the presence of an acid, it is unsuitable for aquarium use.
Play sand is an inexpensive option to many axolotl keepers, however, one must keep in mind it will need to be very carefully washed and sifted prior to use. It should also be tested with a magnet for the presence of iron oxides that can cause damage to your expensive filtration systems. Any sand showing any magnetic particles should be exempted from aquarium use.
Sand sold for use in the construction trades should be avoided, as should sand designed for use in swimming pool filtration systems. These sands are often chemically treated, or contain undesirable substances for aquarium use.
Most commercial sands sold for freshwater use in the pet trade are completely safe to use after washing. Sands sold for terrestrial enclosures, or “reptile safe“sand should be avoided as they are often various forms of limestone and can wreak havoc on water quality. One should be careful not to use sand at a depth greater than 2cm, as this can lead to detrimental effects from anaerobic bacterial action, causing formation of gas pockets. These gas pockets when stirred and disturbed, release an unpleasant odour and can also cause dark streaking bands to form across the substrate layer.
Geography
Now that you have your substrate down it’s time to think about what sort of features you want in the tank. Nature has many stunning things to offer for tank decoration, and your local aquarium shop is likely to sell plenty of interesting pieces.
You can create an all natural look using large stones and driftwood. Manufactured ornaments tend to look a bit tacky and out-of-place in an aquascaped tank; however this is entirely a matter of personal preference.
RocksThere are two very simple ways to test rock to be sure they are safe for your aquarium. The first method uses Muriatic Acid (MA). This can be found at either a swimming pool supply store or possibly a hydroponic supply store. To test any given rock, put a few drops of MA on the rock, wait a couple of seconds and watch for bubbles. If bubbles are seen, this rock is NOT safe. Distilled white vinegar can also be used in a pinch. The MA test is more accurate though. When working with any chemical, it is a wise idea to use proper PPE such as gloves and splash proof goggles.
Conglomerates, that is rock made up of other rock, should always be avoided (They tend to look like concrete). To test a rock with either MA or the Acetic Acid in vinegar, a “fresh face” must be made. This is simple a spot where a piece of rock has been chipped or broken away. Weathered surfaces often do not react with acids.
Rocks with sharp edges should be avoided. In most cases, these edges can be smoothed with a bit of work and a good American cut mill file, readily available at your local DIY store. One must also take care, in enclosures where stone is stacked or piled, to properly secure the rock with aquarium adhesive to prevent accidental crushing deaths or breakage of the tank glass.
Please remember: “When in doubt, leave it out!”Below is a list of rocks that are safe for aquarium use.
Safe Rocks:- Crystalline Quartz ( also known as Rock Crystal, Amethyst, Citrine, Rose Quartz, Smokey Quartz)
- Granite (care must be taken with granite, some forms contain high concentrations of pyrite)
- Jade
- Microcrystalline Quartz, also known as Quartzite and its metamorphic forms: Jasper, Agate, Chalcedony, Sard, Carnelian; Green coloration should be avoided due to presence of copper)
- Onyx
- Petrified Wood
- Slate
- Basalt
- Porphyry
- Schist
- Commercially available “River Rocks”
- Mica
- Tapecrete or similar acrylic based concrete products, properly treated and sealed
- Obsidian
- Coal, as a naturally occurring hydrocarbon, this rock is often contaminated with many other hydrocarbons.
- Lava Rock, not recommended due to a multitude of sharp edges and the possibility of high sulfur and hydrocarbon concentrations
- Coral, causes alkalinity issues
- Dolomite, the metamorphic form of limestone
- Fools Gold also known as pyrite (or any other rock with metallic veins--Acid Producing and even more so, often a lead hazard)
- Any rock with a green or greenish color to it, these are most commonly contain copper)
- Fossils, with exception to those in Slate
- Limestone, the sedementary form of coral
- Manufactured Quarts Crystals
- Marble, if not sealed with a high quality aquarium safe epoxy
- Sandstone
- Shale as it often contains hydrocarbons that can be harmful in a captive enclosure
- All Metamorphic and Sedimentary Rock not on the safe list
To sanitize rocks found in the outdoors, identification is a must. Many rocks contain gas pockets which can be a hazard during the sanitization process. It is suggested that each rock is thoroughly scrubbed with a stiff bristle brush and a supersaturated solution of non-iodized table salt. Once the scrubbing is complete, the rocks should be fully submersed in a large cooking pot and brought to a roiling boil for a minimum of three hours. The pot should preferably be aluminum, non-coated, and have a tight fitting lid. The process MUST be carefully watched as you will need to add more water, or even change the water as the stones simmer.
If any oily sheen, or excessive foaming is noticed during boiling, the rock should be excluded from aquarium use. It should also be mentioned here, that the risk of gas pockets causing rock to explode is very, very high and proper measures should be taken to prevent burns, scalds, and shrapnel injuries.
Once boiled, it is highly recommended that the rocks be thoroughly rinsed in tap water, then soaked a minimum of 24 hours in cold tap water treated for aquarium use. Use of a good water detoxification product, like Amquel+ or Prime should be used at twice the manufacturer suggested dosage. This will help to remove any trace elements that may be in the rock, or introduced during the boiling process.
DriftwoodCare must be taken with driftwood choices, as it can cause issues in a tank. The main points to think about are:
If it's very red or brown in colour and looks ‘woody’ or ‘fresh’ then it WILL turn your tank water brown. It will leach tannins, these won't harm your axolotls but it will make your water look very dark and murky.
Some types of driftwood slowly disintegrate in the water and fill your tank up with ugly sediment that is difficult to clean out; very old-looking wood that is almost black in colour is the main offender in this category.
Stuff loves to grow on some types of driftwood, so you can end up with ‘furry’ wood that'll need to come out for a cleaning every now and then. Some driftwood type can also adversely affect your water chemistry.
A generally safe choice is to pick driftwood that is grey and looks very hard. This will not disintegrate or leach any tannins into the water.
Mopane woodAnother excellent choice is Mopane (pronounced mo-PAH-nee) wood, it looks fantastic and doesn't disintegrate, leach tannin or alter your PH. You can get it from aquarium shops or by mail order.
A side note on driftwood - the live plants that you can buy called "driftwood creations" should not be underestimated - these are very easy to manage and look great in your tank.
Creation and Assembly
This stage is all about shuffling around and being creative. Use your stones and your driftwood together; pile them up a bit; be a bit chaotic. To create a ‘riverbed’ aquascape, try to imagine that the stones and wood have fallen into the river and sunk to the bottom. If you've chosen a huge stone or huge piece of wood as a centrepiece then put that in first and work the other items around it. Stack things up, make caves and hiding places. Be extra careful that anything piled up is secure and won't collapse. Try to create an aquascape with dimensional layers – lower ground/substrate level, mid-level and top/surface level, as well as foreground, midground and background.
LightingA low wattage, dim light source such as the Hagen Aqua-glo 40W light can be used. This light is not too bright, but it is specially designed to promote plant growth and it really brings out the vibrance of the colours in your tank. The light can also be automated and timed to switch on for a period of about 6 to 8 hours per day, giving the plants their dose of light. For the plants that do not require too much light to grow, this is very adequate. Fluorescent type lights are preferred over incandescent lights as they release much less heat.
TemperatureIf you are using plants that thrive best in temperatures of around 16-18C (61-65F), a heater that serves the purpose of not letting the temperature fall below 16 degrees can be useful. There are many methods available for temperature control ranging from ice-bottles in the summer up to aquarium chillers and you should pick the best option that you can afford. You want to aim for a stable 16-18C (61-65F) so that both the plants and axolotls remain comfortable. The plants would be able to tolerate warmer temperatures but not the axolotls.
FloraAxolotls don't like it too warm or too bright so this narrows our choices for aquatic plants a bit.
There are a lot of plants that simply will not survive unless they get a lot of light and live in warm water, however there are also plenty that are not so fussy. This section will cover recommendations on plants; it is by no means a complete guide to the only plants you can have in an axolotl tank so please do your own research and see what you can find, there is a wide array of aquatic plants species available, many which may be suitable for axolotl tanks.
Important points when considering plants:
- Those plant cuttings sold in bunches are not recommend. With the possible exception of Elodea they tend to die, rot and pollute your tank.
- ‘Tropical’ plants, as they're almost always advertised in pet shops, are not necessarily tropical and many will do fine in lower temps.
- ‘True aquatic’ is the term to look for - this means that the plant you're buying is an actual aquatic plant and is meant to live underwater.
- Choose plants that can handle low-light and low-temperature situations, you don't want to blind and boil your axolotls just to keep your plants alive.
- Research! There's plenty of information on the net about aquatic plants, what conditions they need and how to care for them. Look for hardy, low maintenance plants.
- Plants require nutrients to support growth.
You can often find some amazing plant specimens attached to driftwood called ‘Driftwood Creations’. More often than not, the plants on these creations are of the Anubias family and therefore are a fairly safe bet for surviving in your cold, dark tank.
These are a good choice because they look fantastic, are highly transportable and cover two requirements (features and plants) of the aquascaped tank in one go. However, often these creations will be on display in stores in the fish tanks so beware of disease and other parasites that may be present on them. A quarantine period of 30 days minimum and a very good cleaning is recommended before they go into your axolotl tank.
Some recommend plants:
- Anubias Nana - great plant, virtually indestructible, hardy and low maintenance.
- Anubias Isabelle - very tough, taller than the Nana.
- Anubias Barteri - just like the Nana, but a bit bigger and with rounder leaves.
- Java Fern - one of the toughest aquatic plants you can get - grows anywhere!
- Java Moss - grows anywhere as well, can be made into a sort-of "carpet"
- Lilaeopsis - this is like grass, you can make a beautiful lawn in your tank with it.
- Eleocharis (Hairgrass) - same as with Lilaeopsis tends to be a bit taller though.
- Pongol - this is actually Mondo Grass, so it's not a true aquatic but survives (doesn't grow, just survives) for ages submerged, not really recommended.
- Congensis - quite striking for a centrepiece plant.
- Riccia - Riccia generally needs a lot of light to grow properly, thus only suitable for brighter tanks.
- Narrow Chain Sword - another grassy-type thing. Looks pretty, grows happily.
I recommend that you purchase plants from only a trustworthy source that does not keep fish or any other animals in with their plants. Keeping fish with plants can potentially result in the plants carrying diseases or other unwanted things into your axolotl environment.
The other thing to note regarding the purchase of plants is snails! It is very common for new plants to be carrying small snails. While they are generally harmless and can help with cleaning the glass in your tank they are virtually impossible to eradicate once you have them and they can reach plague proportions in there.
Planting DesignPlants generally fit into 3 "zones" (fore, mid and background).You can use tall, leafy things like java fern and afzelii as great background plants, but you can equally use them elsewhere to create an effect. Try to plant the tall ones first, then the shorter ones and then plant lawn-like plants everywhere else. Creativity and a bit of chaos is again the order of the day here, and don't be afraid to go a bit experimental. Substrate is boring - plant grass on it! From the list above there's a variety of ways to plant each one, most will be best planted in the substrate but some (e.g. Java Fern and Java Moss) will rot if planted into the substrate.
Planting MethodAnubias (any type)
These plants are pretty happy regardless of what you do to them. You can attach them to a piece of driftwood or a stone using some fishing line or you can plant them in the substrate. If planting them, just ensure that the rhizome (the bit directly above the roots that the stems come out of) is not buried.
Java Fern
This is best attached to a rock, its roots will ramble around and find their own best method. Java Fern is prone to rotting if you bury it in substrate.
Java Moss/Riccia
These two don’t really have roots at all so you can’t plant them as such. The best method with them is to spread them thinly over something like a stone or a piece of slate and tie them on with fishing line. A hairnet is a great method for holding this stuff down if you’re covering a large area, don’t worry too much if you can see the net through the moss, it grows pretty quickly and will soon hide the net.
Lilaeopsis/Eleocharis
Often these will come in a pot and it’s perfectly fine to leave them in the pot and secure them down somewhere in your tank, however these make beautiful ‘lawns’ if you take the extra effort of planting them. They grow better if you remove them from the pots and plant them in the substrate.
To achieve the lawn effect, you’ll need quite a lot of the plants as they don’t tend to spread a great deal in a low-light environment. Plants them close together in a dense mat and then leave them alone, they will take root and thicken out, growing together over time to achieve the lawn effect you’re after.
Care of plants:There are all sorts of products that you can buy and spend a fortune on that is advertised as being essential for success in the planted aquarium - CO2 systems, fertilisers and such. However they are not necessary for the axolotl tank. In general, it is best to avoid addition of any chemicals into the axolotl tank. Axolotl wastes itself can provide essential nutrients for the plants. “Flourish" liquid plant food and "Flourish Excel" from Seachem has been used quite successfully without visible harm to the axolotls but in general it is still best to avoid introducing chemicals or products into the axolotl tank.
Finishing Touches
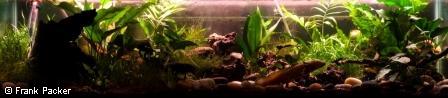
As a finishing touch, you might like to scatter large riverstones (see the picture) over the bare areas of substrate. These look stunning and tie the whole job together - it will really start to look like a lush riverbed. You can buy these stones in a bag from hardware stores and landscaping suppliers - they're about AU$15 for a 20kg bag.
Ongoing Maintenance
Cleaning can be a bit harder in an aquascaped tank. Patience and diligence is required to carefully clean around all the nooks and crannies as detritus and wastes can accumulate in these crevices. A gravel siphon is effective; however, care must be taken not to disturb the substrate and plants too much.
You can minimise accumulation of uneaten food by hand feeding the axolotls. This ensures that uneaten food is promptly removed and not left in the tank. You can also incorporate a feeding area into your tank design – a food dish or a bare patch somewhere in the tank that you can easily clean up after feeding sessions.
It seems like a lot of work but it's worth it. With a bit of thought and care, you can have a tank that is a comfortable and luxurious home for your axolotls, stunning to look at and a beautiful addition to any lounge room.